-40%
Battery Charger Repair Kit for Club Car PowerDrive3 #26560, (Diodes & Breaker)
$ 44.88
- Description
- Size Guide
Description
After very many years of experience repairing golf cars and chargers I have decided to compile a kit available for sale to help the average "Do-It Yourself" person repair common problems with their Club Car PowerDrive3 Battery Charger. The kit includes the three items with the highest failure rate. The chance of anything else in the charger failing is very slim.My components vary from others found on ebay for one simple reason... They're the exact same parts that were used by Lester Electronics when they built these chargers. Please be aware that with electronics there are many "shortcuts" people tend to take to save money, such as selling cheaper parts that will perform the same tasks as the original parts, for a little while at least. The parts in my kit have been proven many times to out-last many of the cheaper "Budget" parts for lack of better description. Believe me I know, I've tried them.
Buy from me with confidence, the quality is there. If you have any questions at all about these items please do not hesitate to ask me. I will be glad to help you in any way that I can.
VERY IMPORTANT INFORMATION:
The PowerDrive3 charger, introduced in 2007, comes in two different variations. This kit includes the "Double Diode" conversion and will fit in either style of PD3 charger. This is a better design than the single rectifier and is intended to replace it. If you choose to replace the single rectifier, I have a listing for that configuration as well.
Charger Symptom: When plug is inserted into vehicle, charger will click and the ammeter will rise. The needle on the ammeter begins fluctuating rapidly for a few seconds. Shortly afterwards, the circuit breaker will trip and the charger dies. In some cases, the rectifier may emit smoke or sparks. If this is your symptom, this is your kit. If your charger doesn't "click" at all, you have a different issue.
The early models used a bridge rectifier, much like their PowerDrive2 predecessors. The more recent PowerDrive3 chargers used two diode strips.
Please refer to the photographs to determine which style rectifier setup your charger is equipped with. This kit contains the necessary parts to convert style A to style B. If your charger is already equipped with style B, you'll simple remove the diode strips from the included aluminum panel and bolt them into your charger.
You may have noticed that this kit does not include a relay, unlike my kits for earlier chargers. The reason for this is the fact that the relay is much more expensive than the older style very rarely fails in these chargers due to a different voltage suppressor design.
If this kit does NOT fix your charging problem I offer all of my buyers a 100% guarantee that I will be here for support after the sale. I understand these charging systems perfectly and will be MORE THAN HAPPY to walk you through the steps to find out EXACTLY what is causing your issue. Please feel free to ask for help. I honestly do not mind at all. Thank you for looking at my listing.
---------------------------------------------------------------------------------------------------------------------------------------------
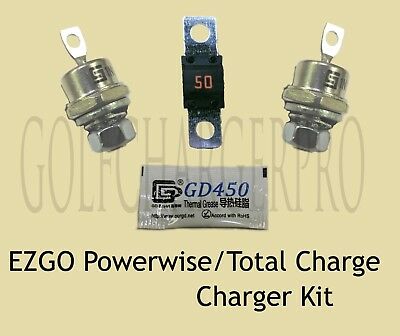
Included in the Kit are:
1 - Double Diode Board (PowerDrive3 update)
1 - Circuit Breaker
1 - Packet of Thermal Paste
---------------------------------------------------------------------------------------------------------------------------------------------
I also include a free wiring diagram for this charger to ensure that you make all of the right connections. It is either available for shipment with the package or it may be emailed. Please feel free to request one at the time of purchase if you wish to receive it. If you forget to request it, no big deal. Email me. I'll send it to you at no charge.
The installation is extremely simple. Remove the screws that hold the case to the charger, remove the components that are included in the kit and replace them individually. The rectifier is simply bolted to the back of the charger. Remove the rectifier and follow the instructions in the kit to install the new diode board. The circuit breaker has tabs on it that will squeeze inward to allow it to "Snap" out of place. Note that it may be easier to access the circuit breaker if you un-bolt the transformer and lift it up to gain access. Make sure both power cords are un-plugged at the time of installation.
Please feel free to ask me any further questions you may have as to why this kit beats anything else for sale on EBAY. I'll be more than happy to explain. Enjoy your EBAYing!
-Shipping labels are normally printed the same day as the purchase is made. Packages will be dropped off at the post office the next day before the first mail collection. I strive for excellent standards in shipping and do everything in my power to ship at lightning speeds.
-I offer a 100% money-back guarantee if these items are misrepresented in any way.
The items in this kit are also available separately. If you are interested in purchasing individual items please refer to the above photograph to diagnose your specific issue and click on the hyperlink below to purchase the proper component. Thank you!
Note: The electronic items in the photograph of the entire kit are the items you will receive. You will not receive the tools in the photo. Please note that the circuit breaker may appear slightly different in appearance than the one currently installed in your charger due to vendor changes throughout the years. All parts are compatible with each other and all PD3 #26560 chargers will accept this entire kit. No worries! Enjoy your EBAYing!


